X trend image tool

Load in 4K Image Maker for X

The phrase “tap, hold, and load in 4K” is commonly used to prompt people to open a hidden-image post on X. RevealStudio makes the transparent PNG8 behind that visual reveal; it does not artificially increase the source to 4K resolution. Build the two viewing states, keep the original PNG, and test the final post on X.

Visual guide

See the real result before you make one

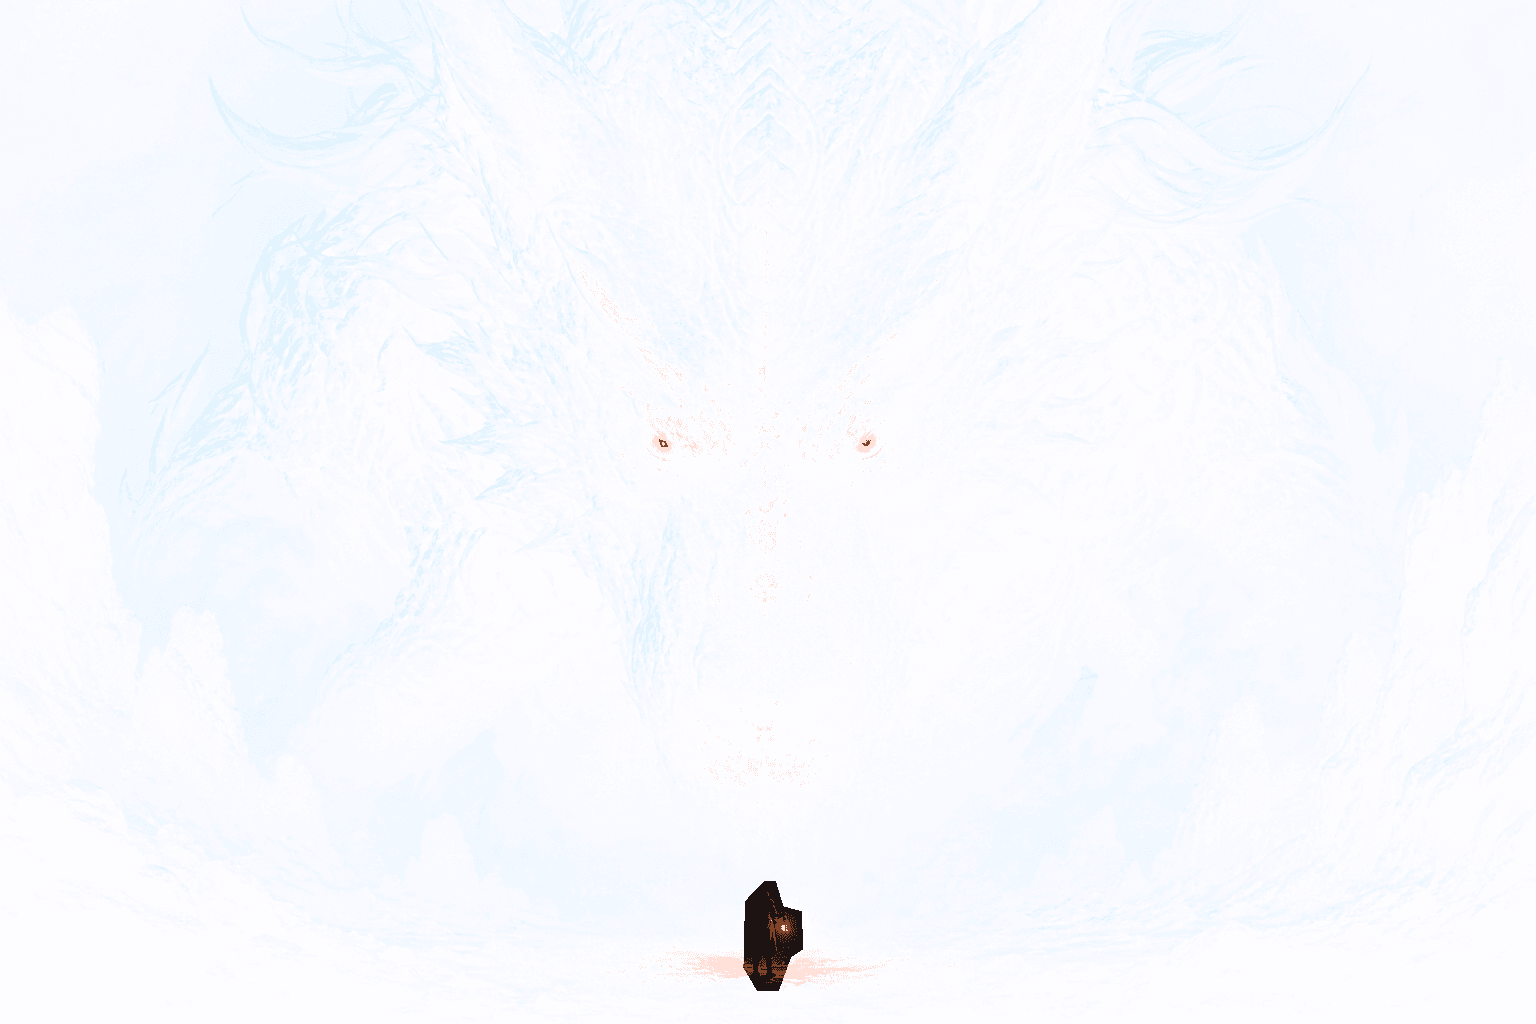
This is a real PNG made in RevealStudio. Press and hold the preview to switch between the X timeline state and the complete image.

REAL X PREVIEW
Real X timeline preview before pressing and holding the reveal imageThe complete dragon image revealed after pressing and holding
  1. 01Upload a real image
  2. 02Paint the hidden area
  3. 03Compare both states
  4. 04Export transparent PNG
Workflow

From upload to transparent PNG

Upload, mask, preview, and export without sending the source image to an image-processing server.

  1. 1Upload the complete image
  2. 2Mask the hidden payoff
  3. 3Compare timeline and expanded previews
  4. 4Export the PNG8 and test it on X

What “load in 4K” means in this trend

In these posts, load in 4K is an interaction prompt rather than a promise that the image changes resolution. The surprising change comes from the prepared transparency and the difference between the timeline preview and the expanded image view.

X does not publish a compatibility guarantee for this hidden-image effect. Device settings, data saver modes, resizing, and platform updates can change what a viewer sees, so use accurate captions and treat the live post as the final check.

Build a clear before-and-after viewing state

Choose a source with a bold subject and a strong visual reward. Paint the feature that should be hidden, then leave enough context in the timeline version to invite the interaction. A blank white frame is usually weaker than one deliberate clue.

Preview both states at mobile feed size. The expanded image should reveal a meaningful change immediately, without requiring the viewer to compare tiny details or read a long explanation.

Preserve transparency from export to X

Download the PNG8 directly from RevealStudio and keep it as the master. JPEG has no alpha channel, and screenshots or compressed photo transfers flatten the prepared transparency even if the picture still looks normal in a gallery.

Attach the original file using a path that preserves PNG data. After publishing, check the timeline and expanded view on the devices that matter to your audience before relying on the effect for a launch.

Use an accurate X caption

A short instruction such as “tap and hold to reveal” is clearer than claiming the file becomes higher resolution. If you use the familiar load in 4K phrase, make sure the visual payoff actually appears when the image is opened.

Add one relevant next step only after the reveal prompt. For product posts, link to the launch; for artwork, credit the creator; for spoilers, place the warning before the interaction instruction.

FAQ

Common questions

Does RevealStudio upload my original image?+

No. The MVP editor processes jpg, png, and webp files in the browser with Canvas. The image is not sent to a server by default, which keeps creator drafts private.

Why should the output be PNG?+

PNG keeps the alpha channel. The transparent area is what lets a reveal image behave differently between a compressed timeline preview and a long-press or expanded view.

Why can the result look different after posting to X?+

Social platforms resize, compress, and preview images differently. RevealStudio gives a browser preview and conservative export defaults, but the final result can vary after platform processing.

Create a reveal image in your browser

No account is required. The source image stays on your device while you prepare the transparent PNG.

Open editor